Home » Without Label » How To Put Crown Molding On Kitchen Cabinets - Crown Molding On Bottom Of Kitchen Cabinets / Kitchen ... - I recommend at least 1 inch of space above the line to attach the trim.
How To Put Crown Molding On Kitchen Cabinets - Crown Molding On Bottom Of Kitchen Cabinets / Kitchen ... - I recommend at least 1 inch of space above the line to attach the trim.
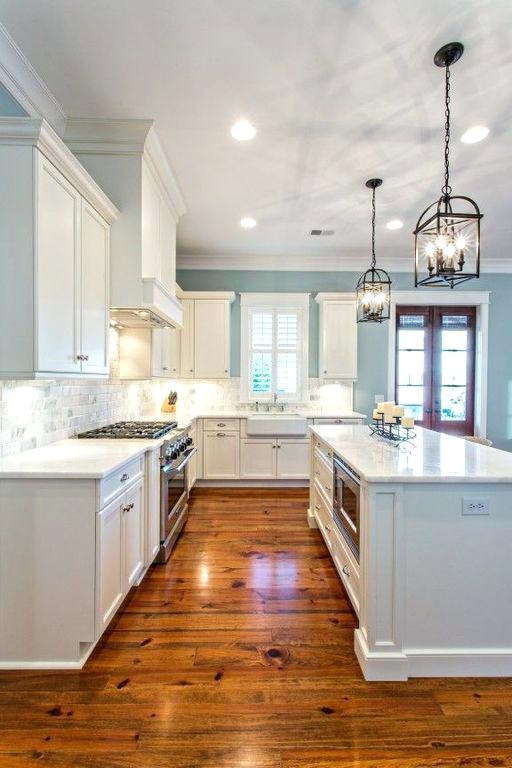
How To Put Crown Molding On Kitchen Cabinets - Crown Molding On Bottom Of Kitchen Cabinets / Kitchen ... - I recommend at least 1 inch of space above the line to attach the trim.. Then stand back and look at your crowning achievement. These steps may vary depending on your kitchen, cabinets, style, and crown moulding, however, it can give you a pretty accurate idea of the scope of your project. For the front filler piece, drill from underneath the inside of the cabinet, and then secure that piece with wood screws. Crown molding is decorative trim that is added to the top of your cabinets. Check out our video review and demo of adding crown molding to your kitchen cabinets.
Attach crown molding run a bead of glue along each piece of molding (image 1). Titebond no run, no drip wood glue provided by titebond. Place the crown molding at the top of the riser so it touches the ceiling and nail it in place to the riser (image 2). If you have high ceilings, we recommend leaving space. Take your time and measure carefully.
A General Guide on How to Install Crown Molding on Kitchen ... from www.housesumo.com Measure each length and side of your cabinets. These filler wood pieces should be held with screws on the top of the cabinets. For the front filler piece, drill from underneath the inside of the cabinet, and then secure that piece with wood screws. Crown molding is decorative trim that is added to the top of your cabinets. Not only do you have to be aware of an inside corner, outside corner, right board, or left board, you also have to magically hold the crown molding up against your miter saw fence at just the right angle or else your corners will never fit together. Provide a nailing surface for crown moulding by attaching solid wood mounting strips to the top edges of the cabinets. Ask this old house general contractor tom silva installs crown molding on kitchen cabinets with full overlay doorssubscribe to this old house: This nailer is now going to be base that you will attach your molding to.
Using some wood glue and a nail gun, attach the 1 x 2's to the tops of the cabinets.
Once the cabinets are bought (or built) and installed your options are limited to the situation you have in front of you. Then stand back and look at your crowning achievement. Not only do you have to be aware of an inside corner, outside corner, right board, or left board, you also have to magically hold the crown molding up against your miter saw fence at just the right angle or else your corners will never fit together. I am in the final phase of my kitchen remodel and my cabinet maker brought 4 crown molding to place on top of the cabinets. Measure out and cut a length of crown molding that is at least a few inches longer than the side of your cabinet. Use a straight edge (such as a long level) to mark where the crown molding will sit on the cabinet facing. (use one long strip for a row of cabinets the same depth.) then apply wood glue to each strip, nail it in place, and let dry. If you have cabinets that don't have enough room to attach directly, b uild a frame to sit on top of the cabinet. Pick one side of your cabinet to start with. My husband likes the clean straight edged look of the cabinets the way they are and i'm undecided. Attach the wood to the cabinets. Crown molding can either bond with the ceiling or allow for space above the cabinet. Attach crown molding dry fit the crown molding by holding the front piece and a side piece against the front and side of the baseboard (image 1).
Check out our video review and demo of adding crown molding to your kitchen cabinets. For more information, visit www.titebond.com. Paint or stain to your preference. The benefit of installing crown molding is that it draws the eye upward, showcasing the elegance of your cabinets. The height will give the crown molding a place to rest against.
Kitchen Cabinet Crown Molding - YouTube from i1.ytimg.com Using some wood glue and a nail gun, attach the 1 x 2's to the tops of the cabinets. I am in the final phase of my kitchen remodel and my cabinet maker brought 4 crown molding to place on top of the cabinets. Steps to install crown molding while installing crown on cabinets isn't as simple as installing trim around doors and windows, these are the steps to install crown molding on cabinets: Not only do you have to be aware of an inside corner, outside corner, right board, or left board, you also have to magically hold the crown molding up against your miter saw fence at just the right angle or else your corners will never fit together. If you have high ceilings, we recommend leaving space. If you're planning on installing the trim yourself as a diy project, keep this important tip. Make a note on how many pieces and at what length you. Attach crown molding dry fit the crown molding by holding the front piece and a side piece against the front and side of the baseboard (image 1).
Place the crown molding at the top of the riser so it touches the ceiling and nail it in place to the riser (image 2).
Using some wood glue and a nail gun, attach the 1 x 2's to the tops of the cabinets. Set your miter saw to 45 degrees. Finding the right crown moulding for your kitchen cabinets. Crown mouldings on varying cabinet heights. Using cabinets of varying heights or landscaping as. Measure and mark the front section of crown molding to the cabinet width. If you have cabinets that don't have enough room to attach directly, b uild a frame to sit on top of the cabinet. It adds a big visual impact and brings really amps the sophistication factor up a notch. There are countless ways to style your kitchen cabinets. Cut at one mark, then move the molding along to the next mark. Fasten the crown molding to the top of the cabinet (we used a brad nailer). Steps to install crown molding while installing crown on cabinets isn't as simple as installing trim around doors and windows, these are the steps to install crown molding on cabinets: It's a good idea to put the glue on your cabinet and then set the wood on top.
This nailer is now going to be base that you will attach your molding to. Crown molding can be tricky if you move too fast. Crown molding is decorative trim that is added to the top of your cabinets. Once the cabinets are bought (or built) and installed your options are limited to the situation you have in front of you. It adds a big visual impact and brings really amps the sophistication factor up a notch.
Crown Molding Ideas For Your Home from www.thespruce.com Not only do you have to be aware of an inside corner, outside corner, right board, or left board, you also have to magically hold the crown molding up against your miter saw fence at just the right angle or else your corners will never fit together. Make a note on how many pieces and at what length you. My husband likes the clean straight edged look of the cabinets the way they are and i'm undecided. For the front filler piece, drill from underneath the inside of the cabinet, and then secure that piece with wood screws. Using cabinets of varying heights or landscaping as. Once the cabinets are bought (or built) and installed your options are limited to the situation you have in front of you. Then stand back and look at your crowning achievement. Attach the wood to the cabinets.
These steps may vary depending on your kitchen, cabinets, style, and crown moulding, however, it can give you a pretty accurate idea of the scope of your project.
If you have cabinets that don't have enough room to attach directly, b uild a frame to sit on top of the cabinet. Cuts are made while crown molding is upside down. Attach crown molding dry fit the crown molding by holding the front piece and a side piece against the front and side of the baseboard (image 1). Cut the molding according to the measured length. Use a pin nailer to nail into the corners of the two pieces of crown molding (image 2). As you mount the wood to the top of the cabinet, make sure it sits flush with the door. The height will give the crown molding a place to rest against. Place the crown molding at the top of the riser so it touches the ceiling and nail it in place to the riser (image 2). There are countless ways to style your kitchen cabinets. Mark all sides of the cabinet onto which you will be attaching crown moulding. Make sure that their size is the same as your moldings. Fasten the crown molding to the top of the cabinet (we used a brad nailer). For more information, visit www.titebond.com.

/CabinetsWithCrownMolding-5be2ef7dc9e77c00510f2941.jpg)
